Step-by-Step Guide to Preparing and Lighting Shisha Charcoal
Share
Shisha smoking is a popular and enjoyable activity for many, but the experience can be greatly enhanced by properly preparing and lighting your shisha charcoal. This comprehensive guide will walk you through the process step-by-step, ensuring you achieve the best possible smoking session. By following these detailed instructions, you can enjoy a smooth, flavorful, and hassle-free shisha experience.
Table of Contents
- Introduction
- Types of Shisha Charcoal
- Natural Charcoal
- Quick-Light Charcoal
- Preparing Your Shisha Setup
- How to Light Natural Shisha Charcoal
- How to Light Quick-Light Shisha Charcoal
- Tips for Maintaining Charcoal Heat
- Common Mistakes to Avoid
- Frequently Asked Questions
- Conclusion
1. Introduction
Properly lighting shisha charcoal is crucial for a satisfying shisha session. The right technique ensures even heat distribution, optimal flavor, and a longer-lasting smoke. This guide covers everything you need to know about preparing and lighting shisha charcoal, from choosing the right type to maintaining the perfect heat throughout your session.

2. Types of Shisha Charcoal
Natural Charcoal
Natural charcoal is made from organic materials such as coconut shells, bamboo, or wood. It is free from chemicals and additives, making it a healthier option for shisha smoking. Natural charcoal burns longer and provides consistent heat, enhancing the flavor of the shisha tobacco.
Advantages:
- Chemical-free and natural
- Long-lasting and consistent heat
- Clean taste
Disadvantages:
- Takes longer to light
- Requires a charcoal burner or stove
Quick-Light Charcoal
Quick-light charcoal is treated with chemicals to ignite easily with a lighter or match. It is convenient and ideal for on-the-go shisha sessions. However, it may impart a chemical taste to the shisha and does not burn as long as natural charcoal. WE DO NOT RECOMMEND THE USE OF THIS CHARCOAL.
Advantages:
- Lights quickly and easily
- Convenient for travel
Disadvantages:
- Contains chemicals
- Shorter burn time
- Potential chemical taste

3. Preparing Your Shisha Setup
Before lighting your charcoal, ensure your shisha setup is ready:
- Clean the Hookah: Ensure your hookah is clean and free from residue from previous sessions.
- Fill the Base: Fill the base with water, ensuring the water level covers about an inch of the downstem.
- Pack the Bowl: Pack the bowl with your favorite shisha tobacco, ensuring it is evenly distributed without overpacking.
- Cover with Foil or use an HMD: Cover the bowl with aluminum foil and poke small holes for airflow.
4. How to Light Natural Shisha Charcoal
Lighting natural shisha charcoal requires a bit more time and effort, but the results are worth it. Follow these steps for optimal results:
- Use a Charcoal Burner or Stove: Place the natural charcoal pieces on a charcoal burner or stove.
- Heat the Charcoal: Turn on the burner and allow the charcoal to heat for 5-10 minutes. The charcoal should glow red and develop a light layer of ash when fully lit.
- Flip the Charcoal: Use tongs to flip the charcoal pieces halfway through the heating process to ensure even lighting.
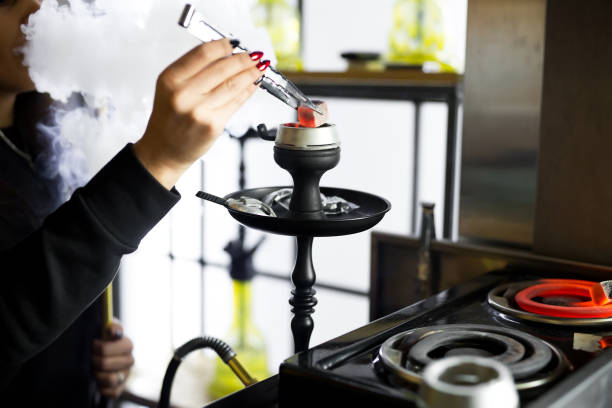
- Transfer to the Bowl: Once the charcoal is fully lit, use tongs to carefully transfer the pieces to the foil-covered bowl.

5. How to Light Quick-Light Shisha Charcoal
Quick-light charcoal is easier to light and can be done with a simple lighter or match.WE DO NOT RECOMMEND THE USE OF THIS CHARCOAL. Follow these steps:
- Hold with Tongs: Hold the quick-light charcoal piece with tongs.
- Ignite with a Lighter: Use a lighter or match to ignite the charcoal. It will start to spark and emit smoke as it lights.
- Wait for Full Ignition: Allow the charcoal to fully ignite and develop a light layer of ash. This usually takes about 1-2 minutes.
- Place on the Bowl: Once fully lit, place the charcoal pieces on the foil-covered bowl using tongs.
6. Tips for Maintaining Charcoal Heat
- Rotate the Charcoal: Periodically rotate the charcoal pieces to ensure even heat distribution.
- Use a Wind Cover: A wind cover can help maintain consistent heat and prevent the charcoal from burning too quickly.
- Add Fresh Charcoal as Needed: If the heat starts to diminish, add a fresh piece of lit charcoal to maintain the optimal temperature.

7. Common Mistakes to Avoid
- Using Wet Charcoal: Ensure your charcoal is completely dry before lighting, as moisture can make it difficult to ignite and affect the flavor.
- Overpacking the Bowl: Overpacking the bowl can restrict airflow and cause uneven heating. Pack the shisha tobacco loosely for the best results.
- Ignoring Safety: Always use tongs to handle hot charcoal and keep a close eye on the lighting process to prevent accidents.
8. Frequently Asked Questions
Q: Can I reuse shisha charcoal? A: No, shisha charcoal should not be reused. Once it has burned out, it loses its heat and effectiveness.
Q: How many pieces of charcoal should I use? A: Typically, 2-3 pieces of natural charcoal are sufficient for a standard shisha session. Adjust based on the size of your bowl and heat requirements.
Q: What is the best type of charcoal for beginners? A: Quick-light charcoal is easier for beginners due to its convenience and ease of lighting. However, natural charcoal provides a better smoking experience and is recommended as you become more experienced.
9. Conclusion
Properly preparing and lighting shisha charcoal is essential for a smooth and enjoyable smoking session. By understanding the differences between natural and quick-light charcoal and following the detailed steps outlined in this guide, you can enhance your shisha experience. Remember to maintain the heat, avoid common mistakes, and always prioritize safety. Enjoy your shisha sessions and happy smoking!
For more tips and recommendations, visit LocosShisha.com. Happy smoking!
